Wednesday, December 28, 2016

Failed to map database objects. An item with the same key has already been added.

We just released a new build (9.0.5.0) of xSQL Schema Compare tool that addresses a recently reported issue with object mapping. In certain cases the database schema comparison may fail in it's first stage (object mapping) with the error message "Failed to map database objects. An item with the same key has already been added." 
If you run into this issue please download and install the latest build from our website: https://www.xsql.com/download/sql-server-comparison-bundle

Friday, December 16, 2016

Synchronization tools for SQL Server Express

Most of the tutorials/case studies I have presented in this blog have had SQL Server Enterprise edition as their primary focus. However, the reality is that, this version, if you didn't get the hint from its name, is mostly for big enterprises that need advanced features like SQL Server Agent or Analysis Services. In any other case this version is a bit of an overkill. In these cases, SQL Server Express is a very good starting point because it's free and offers a lot to work with, such as a full database engine, full T-SQL support, full text search, native XML, and some very useful built in tools like SQL Server Management Studio. A few classic examples where SQL Server Express is a very good option are:

  • Deploying desktop windows solutions that use SQL Server to users who do not own a SQL Server. Given that it's free, its setup can be embedded in the application's setup so that Windows application can enjoy most of SQL Server's functionality.
  • Lightweight web applications that only need to use small SQL Server databases such as websites using a CMS like Umbraco.
  • Testing and developing applications with a local database.
Although it has some limitations regarding the processing power it can use, computer memory available and database size, it is suitable for a wide range of applications. Now, this might be something that one does not think of right away, but at some point in time, it's certain that there will be the need to perform some kind of database synchronization. This is where SQL Server Express has another advantage. Some of the synchronization tools, xSQL Schema Compare and xSQL Data Compare included, follow the same 'no charge' pattern set by Microsoft for this version of SQL Server. The Lite version of these two tools, when used with SQL Server Express offers the full functionality of the licensed version. Let's first have a look at the windows desktop solution case which, in my opinion is a very interesting case where schema synchronization is useful.

Suppose you have created and deployed a desktop Windows application that uses a SQL Server database. A good example here might be an app that does some sort of system monitoring and stores any data it finds in the database. SQL Server Express is a clear choice for the database because there is no complex functionality required and the database size is very likely to be small. Let's also suppose that you have just developed a major update for the app that includes a lot of database changes. How would you go about transferring those changes in the clients' databases? One option would be to generate the full schema script from SSMS and during the update's installation on the client, run that script to recreate the database. As you can imagine this is not an optimal choice because it would delete all the data that are already saved in the database. Another option is to manually generate the script but, in most cases, simply mentioning this, would get you a few "are you kidding?" looks as it is a very tedious and error prone process. Buying a comparison tool seems like a big waste of money if you're going to use it just for this one thing, so here is where the Lite version of xSQL Schema Compare comes to the rescue. For absolutely no cost you get a tool that, on SQL Server Express, will compare the 2 database versions and generate a synchronization script that can be run during the installation process and perform all the necessary changes in the client database.

A scenario in which data comparison on SQL Server Express might be necessary is the development of websites with a CMS. Content Management Systems store all the content management-related data in a database. Take Umbraco for example. It uses an element called Document Type to provide the structure of different webpages. This element stores all the info it needs in a database which can very well be a SQL Server Express database as this type provides the necessary functionality and more. It's always a good idea to develop these sites locally or in a development server and once the changes are fully tested, upload those on the live server. Of course along side this upload, the data on the database need to be transferred as well so that the site admin won't have to recreate the new content structures. Backing up and restoring the database is not a good idea because there are some data (like the actual content of the site) that do not need to be transferred, and if the live site is on a Cloud service like Azure, restoring is not possible. Again, the best option here would be a synchronization tool and a very good choice is xSQL Data Compare. Since the synchronization will be performed on SQL Server Express, the FREE Lite version of xSQL Data Compare can be used to transfer the data. Also, the synchronization process is highly customizable (refer to the online help), so you can manually determine which tables and what data in those tables you want to synchronize. This way, only the data regarding the content structure will be transferred.
In conclusion, I think it's safe to say that the two scenarios mentioned here are a very small portion of the huge number of cases where the application of SQL Server Express is enough to fulfill a software's database needs. Keeping in mind that database synchronization is a process that sooner or later will take place in most of these cases, the extension of the 0 cost principle of SQL Server Express to its synchronization tools like in the case of the Lite versions of xSQL Data Compare and Schema Compare is something that can greatly reduce the development and maintenance costs of software.


Monday, December 12, 2016

Database synchronization in the Software Development Life Cycle

Reading the title, most of you are probably thinking: What does database synchronization have to do with the Software Development Life Cycle (SDLC)? Stick around, because I'll get to that in just a minute. First, let me give a quick introduction to SDLC for those one or two developers out there who, by an impossible twist of fate, may have never heard of SDLC in their working experience. SDLC is a multi-phase process which ensures that good software is supplied to the customers. The term 'good software' has quite a broad definition but generally, 'good software' implies software that meets the requirements, has been tested thoroughly and has minimal errors. SDLC has a number of variations, but usually the software will go through these 5 stages:

  1. Requirement analysis 
  2. Design
  3. Implementation / Development
  4. Testing
  5. Maintenance
Since, the focus of this article is database synchronization, I'll skip the first three stages and go straight to the stages which deal with database synchronization, which are testing and maintenance.

In the context of testing, database synchronization is useful in preparing the testing environment. For example, usually when a web application or a new feature is completed it will first be published on a test domain which is made available only to some chosen individuals / groups. This test site will probably need its own database that will have to be created or updated every time a change is made. You could backup the development database and restore it in the test environment or generate the database's script and execute it on the test environment but this would require the database to be recreated every time which can be a very time consuming process for large databases. Also, this is not possible if the databases are in the Azure cloud environment. The best option here is to use a synchronization tool like xSQL Schema Compare or xSQL Data Compare. So, you could use xSQL Schema Compare to transfer any schema changes from the development database to the testing environment and xSQL Data Compare to transfer any changes in lookup data. As a side benefit, xSQL Schema Compare can also be used to take periodic snapshots of the database in order to keep track of the changes made to it and rollback any of them is necessary.

Since the synchronization process is fairly straightforward and more or less the same in most of the scenarios, I'll first explain the other scenario in which database synchronization is necessary and then demonstrate how it's done and how to automate it.

The other, very important stage where database synchronization might take place in, is maintenance. In this stage, this process is done in both directions. First of all, for every bug fix or new feature, schema changes and lookup data are transferred from the development environment to the testing and then the live one. This process is the same as the one in the testing stage. Secondly, to make sure that the software is working correctly, quality assurance is performed. Quality assurance can have its own environment or it can use the testing environment. One thing is for certain though, it needs to have data that is as close as possible to the live data. Obviously, no type of data satisfies this condition better than the live data itself. By using xSQL Data Compare, these live data can be transferred to the quality assurance environment where they can then be used as needed.
Without further ado, let's proceed to a demonstration of schema and data synchronization. I'll be using the AdventureWorks2012 database in this demo. I made a copy of this database (AdventureWorksCopy) which will be used as the testing environment's database. Suppose this database belongs to a company that has decided to extend its medical and dental benefits to the employee families. Obviously, they will want to have some data in the system for the employee's family members. To do this, a table called EmployeeDependant is added to the HumanResources schema in the development database which has records for the employee's families. Of course, before this feature can be published it needs to be tested, which means that the schema changes need to be transferred to AdventureWorksCopy. There are 4 very simple steps to this process.

  1. Add the databases in xSQL Schema Compare.
  2. Compare AdventureWorks2012 with AdventureWorksCopy. The comparison reveals that there is a table EmployeeDependant in AdventureWorks2012 that does not exist in AdventureWorksCopy (note the one-way arrow to the right).
  3. Generate the synchronization script.
  4. Execute the script. By opening the database in SSMS I can see that the EmployeeDependant table is added to the AdventureWorksCopy database.

The new EmployeeDependant table has a column named 'RelationshipWithEmployee'. Instead of it being a simple VARCHAR column it's better to have it as a foreign key to a 'Relationships' table. The records in this table will probably never change (there is a fixed number of relationship types in a family), so it can be used as an example of the lookup data that may need to be transferred from the development environment to the testing one. Doing this synchronization with xSQL Data Compare is, again, a very straightforward process. Before I show this process' steps, here is a screen shot of the data in the Relationships table that will be transferred to the AdventureWorksCopy database:

To add these data to the Relationships table in AdventureWorksCopy database do the following:

  1. Add the databases to xSQL Data Compare.
  2. Choose the objects that need to be compared. In this case, only the Relationships table will be synchronized, so only that table will be selected from the objects to be compared.
  3. Compare the tables
  4. Generate the synchronization script for the AdventureWorksCopy database, Here is the script that is generated:
    SET XACT_ABORT ON;
    SET ARITHABORT ON;
    SET NUMERIC_ROUNDABORT OFF;
    SET TRANSACTION ISOLATION LEVEL READ COMMITTED;
    
    
    BEGIN TRANSACTION;
    
    
    /*-- -Insert(s): [HumanResources].[Relationships] */
    SET IDENTITY_INSERT [HumanResources].[Relationships] ON;
    INSERT INTO [HumanResources].[Relationships] ([Id],[RelationshipName]) VALUES(1,'Spouse');
    INSERT INTO [HumanResources].[Relationships] ([Id],[RelationshipName]) VALUES(2,'Sibling');
    INSERT INTO [HumanResources].[Relationships] ([Id],[RelationshipName]) VALUES(3,'Parent');
    INSERT INTO [HumanResources].[Relationships] ([Id],[RelationshipName]) VALUES(4,'Child');
    SET IDENTITY_INSERT [HumanResources].[Relationships] OFF;


    COMMIT TRANSACTION;
    
  5. Excecute the script. After execution, if a select query is run on the Relationships table AdventureWorksCopy database, it will display the following data: 


Using a similar process to the one in this demo you can copy the data in the live database in the Quality Assurance database and run any tests that you need.

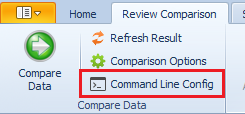
In most cases, these tasks are repetitive. For example, an organization might have the practice of synchronizing the live data with quality assurance every 3 days. Instead of doing this manually every time, you can just generate a XML configuration file for xSQL Data Compare Command Line by clicking the button in the picture below and then, using Windows Scheduler, schedule the comparison to be run periodically with that XML file as an argument.
Automation of the schema comparison is exactly the same as automation of data comparison. The only difference is that xSQL Schema Compare Command Line needs to be used.

In conclusion, the benefits of using synchronization tools like xSQL Schema and Data compare are quite obvious. They can simplify and automate parts of the SDLC that are trivial and boring and would otherwise, take a relatively long time to complete.

Tuesday, November 29, 2016

Big savings every hour, today only

Today only, Nov 30, 2016, from 10am until midnight US Eastern Time, you can get a new Silver Subscription at significant savings (one month subscription not included). The amount you save changes from one hour to the next. Here are the promo codes for each hour:
  • from 10am to 10:59am -> ELASTIC10
  • from 11am to 10:59am -> ELASTIC11
  • from 12pm to 10:59am -> ELASTIC12
  • from 1pm to 1:59pm -> ELASTIC13
  • from 2pm to 2:59pm -> ELASTIC14
  • from 3pm to 3:59pm -> ELASTIC15
  • from 4pm to 4:59pm -> ELASTIC16
  • from 5pm to 5:59pm -> ELASTIC17
  • from 6pm to 6:59pm -> ELASTIC18
  • from 7pm to 7:59pm -> ELASTIC19
  • from 8pm to 8:59pm -> ELASTIC20
  • from 9pm to 9:59pm -> ELASTIC21
  • from 10pm to 10:59pm -> ELASTIC22
  • from 11pm to 11:59pm -> ELASTIC23
There's no particular pattern, the savings for each hour are random so if the price looks right to you don't wait. IMPORTANT: The discount applies to new subscriptions only. The 1 month subscription is not included.

Tuesday, November 22, 2016

Comparing and synchronizing Oracle databases

Applies to: xSQL Oracle Data Compare v1.0 - 2.0

As you may have noticed, most of the articles in this blog focus around scenarios and solutions for databases in Microsoft's SQL Server. However, most of the experienced DBA's in the field of information technology and data sciences have probably dealt with more than one database engine. Anyone working in big enterprises certainly knows of Oracle's database engines (12c being their latest version). According to DB-Engines' ranking, Oracle's databases have the number one spot in the popularity ranking of major database engines with 1413.01 points. Having said this, I felt that it was high time I posted an article that provides some insight into data synchronization in Oracle databases.
Without further ado, let's see how to perform a data comparison and synchronization with xSQL Oracle Data Compare. In this demo I have used the sample HR schema that can be found in this Git repository. I created two databases (orcl and orcl2) and added the HR schema in both. Then, I deleted all the data from the COUNTRIES table in orcl2.
The first thing you do is add the databases. For those of you who are used to xSQL Data Compare for SQL Server, you will notice that the dialog is a bit different:

In the Connection Name, you can specify any name you like to identify the connection with. Personally, I like to keep the Connection Name the same as the Service Name (which is basically the same as Database name in SQL Server). But this will work with any type of string, as long as you type the Service Name correctly. Then you specify the username (Schema name) and the password for that user. In the Host Name and Port fields enter the server name and service's port number on that server. After adding the databases, the comparison and synchronization process is more or less the same as in xSQL Data Compare for SQL Server:

  1. You click on Compare Schemas and choose the databases and schemas you would like to compare. For the schema selection, just leave the '<default>' option selected and xSQL Data Compare will automatically retrieve the tables associated with the user specified when the connection was added. The following tables from the HR schemas in both databases are mapped together.
  2. After the objects are analyzed and mapped together, you can perform the comparison by clicking on 'Compare Data'. Before you do this, you can also edit the comparison and scripting options to customize the comparison process by specifying for example, whether Views should be compared, or if the character case should be ignored in text columns. Apart from this you can also define some simple mapping rules to ignore table name prefixes or suffixes. The comparison result below shows that the COUNTRIES and LOCATIONS tables are different in both databases (LOCATIONS table is different because it contains a foreign key to the COUNTRIES table whose values I set to null in order to delete all the records from the COUNTRIES table).
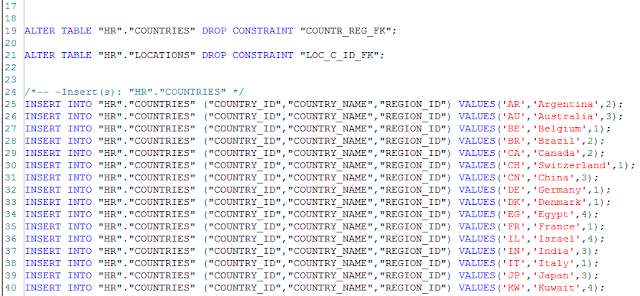
  3. Now, all that is left is to generate the synchronization script for the left database (which is orcl2) and execute it so that the synchronization process is completed. Here is a screen shot of the script:

And there you have it, a complete data synchronization process for two Oracle databases. This is a very basic scenario, but I hope it provides the knowledge needed to perform more complex data comparison and synchronization tasks. You can check out the online documentation to learn how to use xSQL Oracle Data Compare's features complex synchronization tasks.


Thursday, November 17, 2016

How to convert a vertical list to a horizontal one in SQL

*Originally published in our old blog on August 12,  2011

Let's say you have a table that looks something like this:

CREATE TABLE [Source_Vertical](
 [ID] [int] IDENTITY(1,1) NOT NULL,
 [GroupID] [int] NOT NULL,
 [Col1_Group] [varchar](50) NULL,
 [Col2_Group] [varchar](50) NULL,
 [Col1_Individual] [varchar](50) NULL,
 [Col2_Individual] [varchar](50) NULL)

You don't know how many rows there are for each GroupID and your job is to generate a list that contains all values associated with a given GroupID in a single row. Here is a simple way to do it:

First: create a target table that looks something like this:

CREATE TABLE [Target_Horizontal](
 [GroupID] [int] NOT NULL,
 [GroupValues] [varchar](max) NULL)

Second: copy, adjust based on your needs, and execute the following simple script (note I used a vertical line as a value separator - you can use whatever you need, just make sure the character you choose as a separator does not exist inside the actual values of the columns):

DECLARE @GroupID int
DECLARE @GroupID_Current int
DECLARE @Col1_Group varchar(50)
DECLARE @Col2_Group varchar(50)
DECLARE @Col1_Individual varchar(50)
DECLARE @Col2_Individual varchar(50)
DECLARE list_cursor CURSOR
    FOR SELECT * FROM dbo.Source_Vertical ORDER BY GroupID
OPEN list_cursor
FETCH NEXT FROM list_cursor INTO 
 @GroupID,
 @Col1_Group,
 @Col2_Group,
 @Col1_Individual,
 @Col2_Individual
 SET @GroupID_Current = ''
WHILE @@FETCH_STATUS = 0
 BEGIN
 
  IF @GroupID_Current <> @GroupID
   BEGIN
    INSERT INTO Target_Horizontal (Id, GroupValues) VALUES(@GroupID, @Col1_Group + '|' + @Col2_Group + '|' + @Col1_Individual + '|' + @Col2_Individual)
    SET @GroupID_Current = @GroupID
   END
  ELSE
   BEGIN
    UPDATE Target_Horizontal SET GroupValues = GroupValues + '|' + @Col1_Individual + '|' + @Col2_Individual WHERE GroupID = @GroupID
   END
 
  FETCH NEXT FROM list_cursor INTO 
   @GroupID,
   @Col1_Group,
   @Col2_Group,
   @Col1_Individual,
   @Col2_Individual
 END
CLOSE list_cursor;
DEALLOCATE list_cursor;

Finally, you can take the results from the target table and dump them onto Excel or wherever you need to.

Wednesday, November 16, 2016

SQL Jobs on a Mirrored Environment

* originally published on our old blog in January 4, 2012
One of the little challenges a DBA has to deal with when setting up SQL Server mirroring is the handling of SQL Server jobs. SQL Server mirroring works at the database level so SQL Server instance level objects are not mirrored. To achieve a transparent fail-over some of those instance level objects, like certain SQL Jobs related to your mirrored databases, need to be somehow "mirrored" as well. The objective is simple: any relevant jobs that were running on the principal, on fail-over should start running on the mirror. So we have to make sure the jobs are kept in sync and are activated at the right moment (you don't want those jobs to be running on the mirror until the fail-over happens).

One approach would be to have scheduled jobs that periodically syncs the SQL Jobs on the principal with those on the mirror and periodically checks the mirroring status to determine if the jobs on the mirror need to be activated.

Another simpler approach would be to use multi-server jobs. You can use a third server, like the witness for example, as the job "master" and do the following:
  1. All the jobs that must be "mirrored" should be created on the job "master" server as multi-server jobs. 
  2. The target for those jobs is set to be the principal 
  3. Create a job on the job master server that checks the mirror status, let's say every minute
  4. If a fail-over has happened and the mirror has become the principal then it changes the target server for those jobs.
Here is a simple stored procedure that checks the mirroring status and switches the target server for those jobs.

CREATE PROCEDURE [dbo].[usp_ChangeJobTarget] 
  @DBName varchar(256) = 'MyMirroredDB',
  @Principal varchar(256) = 'MyPrincipal',
  @Mirror varchar(256) = 'MyMirror'
AS
BEGIN
  SET NOCOUNT ON;
  DECLARE @current_principal varchar(256)
  DECLARE @principalID int
  DECLARE @mirrorID int
  DECLARE @jobname  varchar(256)
   SELECT @current_principal = principal_server_name FROM sys.database_mirroring_witnesses WHERE database_name = @DBName
   SELECT @principalID = server_id from msdb.dbo.systargetservers WHERE server_name = @Principal
   SELECT @mirrorID = server_id from msdb.dbo.systargetservers WHERE server_name = @Mirror
 IF @current_principal like @Mirror
   BEGIN
    -- principal has changed so we need to change the target for all jobs
    -- first let's get the complete list of jobs that target the principal
   DECLARE @JobList TABLE
    (
      [JobName] [varchar](256) NOT NULL,
      [Changed] bit NOT NULL
    )
    INSERT INTO @JobList
      SELECT [name], 0
         FROM msdb.dbo.sysjobs as a INNER JOIN msdb.dbo.sysjobservers as b on a.job_id = b.job_id
         WHERE b.server_id = @principalID 
    -- now for each job on the @JobList we need to change the target from principal to mirror
      SELECT TOP 1 @jobname = [JobName] FROM @JobList WHERE [Changed] = 0 
         WHILE (@jobname IS NOT NULL)
           BEGIN
              exec msdb.dbo.sp_delete_jobserver @job_name = @jobname, @server_name = @Principal
              exec msdb.dbo.sp_add_jobserver @job_name = @jobname, @server_name = @Mirror
              UPDATE @JobList SET [Changed] = 1 WHERE [JobName] = @jobname
              SET @jobname = null
              SELECT TOP 1 @jobname = [JobName] FROM @JobList WHERE [Changed] = 0 
           END 
     END
  END
GO

A couple of notes to keep in mind:
  1. There is a small delay on replicating a multi-server job. In other words, if you change a job or add a new job on the job master server it will take up to a minute for those changes to be reflected on the target server(s). 
  2. The above stored procedure only goes in one direction – changes the target from principal to mirror in case of fail-over. You will need to adjust it to make it work both ways – one simple way to accomplish this is to simply compare the current principal with the target for those jobs and if they don’t match then change the target.
  3. The above script is provided as is - use at your own risk.
Last but not least: check out our SQL Server comparison and synchronization tools, xSQL Schema Compare and xSQL Data Compare they will make your database deployment a breeze. Also, check out our free Script Executor - no other tool in the market today comes close to it.

Monday, November 14, 2016

Customizing mapping in database synchronization

As a DBA doing data comparison and synchronization in databases, you would think that most of your tasks will be on databases that are exactly alike (schema-wise), because why bother placing the same data in two databases that are different right? Well, there are some exceptions in which these databases will have slight differences. For example, you might have two databases, one that stores the live data and one that stores the quality assurance data, in two different servers. Normally you assume that these databases will have the same tables and schemas with exactly the same names. However, there are cases (like mine), in which this is not the preferable option. I, for example, prefer to have some naming convention that would, by looking at the tables or schemas, clearly indicate in which database I’m in, just in case my brain freezes and I start making changes to the live database thinking it’s the quality assurance one. One such convention might be adding a prefix or suffix to the tables or schemas. How do you go about doing the synchronization process in these cases? Let’s look at an example with such synchronization done with xSQL Data Compare.

I have 2 databases:
  • AdventureWorks2012 which will be in the role of the live database. This table has five main schemas: HumanResources, Person, Production, Purchasing and Sales.
  • AdventureWorks2014 which will be in the role of the QA database and as such, all the schema names have the ‘QA_’ prefix.
If the comparison is run with the default mappings, xSQL Data compare will not be able to match any of the objects in the 5 schemas mentioned, because technically, these schemas do not exist in AdventureWorks2014. So here are the objects that would be compared with the default mappings.


As you can see, none of the objects in the 5 schemas in AdventureWorks2012 is listed here. Thankfully, xSQL Data Compare allows for customization of object mappings. This can be done by opening the mapping rules window, which looks like this:


In the first tab you can specify how the schemas are mapped. By default, xSQL Data Compare matches exact schema names. The second option is to ignore the schema name, which will mean that tables with the same name in different schemas will be mapped together. For databases with multiple schemas this has a very high chance of throwing exceptions, but if the databases being compared have only one schema and its name is different in both databases ignoring the schema name is a very quick way to eliminate the different names problem. Lastly, you can choose to manually specify the schema pairs that will be mapped by selecting two schemas in the ‘Unmapped schemas’ section and clicking on ‘Map selected schemas’. In this case I have manually chosen to map every schema in AdventureWorks2012 with its equivalent in AdventureWorks2014. Here are the schemas listed in the ‘Mapped Schemas’ section:


Before I show the results of this configuration, let me explain what can be configured in the other tabs in the ‘Mapping Rules’ dialog. The second tab, ‘Name mapping rules’ allows you to specify prefixes or suffixes to be ignored in table names. This isn’t covered in this example but to quickly explain it, if you have a development database on the right and a production database on the left whose table names have the ‘_dev’ and ‘_prod’ suffixes respectively, in this tab, you can tell xSQL Data Compare to ignore these suffixes so that tables like ‘Employees_dev’ and ‘Employees_prod’ will be mapped together.

The third tab customizes how columns are mapped according to their data types. By default, columns need to have the same data type to be mapped together. This excludes character types which can be either the UNICODE or the ASCII variant (e.g NVARCHAR and VARCHAR will still be mapped together). However, you can specify the more lenient option of mapping data types by compatibility because some data types are compatible with more than one data type. For example, the DATETIME data type is compatible with DATETIME (obviously), DATETIME2 and SMALLDATETIME. If this option is chosen and a column has a DATETIME data type in one database and a SMALLDATETIME data type in the other, they will still be mapped, whereas by default they would not have been mapped.  

Now, to show the results of the specified schema mapping rules


As you can see, the tables in the schemas (Production and QA_Production in this photo) are mapped together and will be compared and synchronized.

This is all well and good, but what if you want to map tables with entirely different names? If you have for example, two databases that have a table with data about the products of a company, but in one database this table is called ‘Products’ and in the other it is called ‘Articles’, ignoring prefixes or suffixes can’t really do the trick. In this case you can either choose to "compare tables/views" option which allows you to manually map the tables/views, or you can use the command line version. The GUI option is obvious and does not need much explaining, whereas the command line option is a bit more involved, In the xml configuration file that xSQL Data Compare Command Line utility can receive as an argument you can specify a custom table mapping schema and then, specify the table pairs, one by one. This will give you the freedom to map together any two tables. Of course, they have to have the same columns in order to successfully be compared and synchronized.

Here is the XML code to map together ‘Products’ and ‘Articles’ tables.

<CommandLineOptions>
    <TableMappingSchema>Custom</TableMappingSchema>
</CommandLineOptions>
<TablePairs>
    <Pair>
        <LeftObject Name="dbo.Products"></LeftObject>
        <RightObject Name="dbo.Articles"></RightObject>
    </Pair>
</TablePairs>


In conclusion, I hope to have provided a demo that will be of some help to all those DBAs or developers that have come across the scenarios mentioned in this article while comparing and synchronizing databases with tools such as xSQL Data Compare.

Friday, November 11, 2016

How to deploy your SQL Server database to a remote server

CASE 1: you have direct access to both the SQL Server where the source database is and the SQL Server where the target database is.

  1. First time deployment
    1. Backup / restore method
      1. Backup the database on the source
      2. Copy the backup file to the target machine
      3. Restore the database on the target
      4. Create logins and set permissions as needed
    2. Compare and Synchronize method
      1. Create database on the target machine (blank)
      2. Use xSQL Schema Compare to compare and synchronize the database schemas of the source and the target. 
      3. Use xSQL Data Compare to populate the remote database with whatever data you might have on the source that you want to publish (lookup tables etc.)
  2. Database exists in the target server
    1. Compare and Synchronize method
      1. Use xSQL Schema Compare to compare and synchronize the database schemas of the source and the target. 
      2. Use xSQL Data Compare to push any data you need from the source to the target. Caution: be careful not to affect any data that exists on the target already.
CASE 2: You can not directly access the target server but you have a way to deploy SQL scripts on that server. As is indeed the case in most scenarios you also should have a way to get a backup of your database from that remote host. In this case follow those simple steps:

  1. Restore the remote database on your local environment
  2. Use xSQL Schema Compare to compare your source database with the restored database. Generate the schema synchronization script and save it.
  3. Use xSQL Data Compare to compare your source database with the restored database. Carefully make your selections to ensure you push only the data you want to push from the source to the target. Generate the data synchronization script and save it. 
  4. Deploy your schema synchronization script to the target machine. 
  5. Deploy your data synchronization script to the target machine.

Both xSQL Schema Compare and xSQL Data Compare are completely free for SQL Server Express with no restrictions or limitations. Furthermore, for other editions of SQL Server the tools are free if the database has under a certain number of objects in it (current limitations are listed here).

Monday, November 7, 2016

Comparing xSQL Schema Snapshots

Applies to: xSQL Schema Compare v7.0.0 – 9.0.2

Before I develop a scenario where xSQL Schema Compare snapshot comparison is necessary let’s explain what xSQL Schema snapshots are. An xSQL Schema snapshot is a compact file that contains all the schema information for a database. In simple words, an xSQL Schema snapshot is basically a picture of a database’s schema at a specific moment in time. These snapshots are very useful if you want to keep track and get a clear picture of the evolution of a database, by comparing the snapshots with each other or with the live database.

Scenario: Naturally, the question that arises is “Where and how would one use this feature?”. Let’s, for the purpose of this article, take the place of a software developer in a relatively big company. In most cases the development department is separate from data management which means that developers do not have any access to the live databases because these databases are managed by entirely different persons. So how would the developer go about updating the live database with the schema changes made in the development database after the development of a new feature is completed? Direct database comparison is not possible because no party has access to both databases. Simply sending an email to the DBA with the changes you need to be made is out the question because it’s error prone and for anything more than very minor changes, it is not feasible.

Solution: Use snapshots! Ideally, the DBA who manages the live database would create a simple job that periodically takes a schema snapshot of the live database and dumps it into a shared repository to which the developers have access. These snapshots would then be used by the developers for auditing and debugging purposes. In this case, you can use these snapshots to compare the development database with a snapshot of the live database, generate the synchronization script and send it to the DBA to execute it on the database. Let’s see how this is done.

For demonstration purposes I created a copy of the Northwind database and took a snapshot of the copy with xSQL Schema Compare. This copy will serve as the live database. Then I added a column on one of the tables in the original database which will serve as the development database. The picture below shows the snapshot in xSQL Schema Compare:


The comparison process for databases and snapshots is exactly the same. For the left database I am using the NORTHWND which has the extra column and instead of the right database I added the snapshot.


After choosing the database and the snapshot, I ran the comparison and xSQL Schema Compare found the difference in the ‘Categories’ table, for which, the left database has one additional column.


If I generate the synchronization script for the right database, it will generate this SQL Statement:


So, at this moment, I as a developer, have the synchronization script which I can send to the DBA and let him/her make the change to the live database represented in this demo by NorthwindCopy. And all of this was done without needing to access the database from which the snapshot was taken.

In conclusion, besides this scenario, xSQL Schema Compare’s snapshots can be used to stimulate a very basic version control for the database’s schema. For example, if you as a developer are not sure, which is the best database construct for a new feature you are about to implement, you can take a snapshot of the database, make the changes you need to do to test the database construct for that new feature, and if something does not work the way it should, you can always roll back these changes by synchronizing the database with the snapshot. 

Friday, November 4, 2016

Get a Free 1 Year Silver Subscription (normally $299) if you can – fun promo

[Promo has expired ] 
Today only (check the post date), you can get a free 1 year Silver Subscription, normally $299, but you will have to work for it. PLEASE DO NOT PUBLISH THE CODE ONCE YOU FIND IT – DON’T RUIN THE FUN FOR EVERYONE! If we find that the code has been published we will immediately terminate the promotion.

Here is what you will have to do: visit the page of the each of the 8 tools listed on the top of the right hand panel on this blog (under the heading "Download Our Tools") in the order that they appear there. From each product's page pick the first letter from the third line in the "Highlights" section. Perform a "Bitwise Exclusive OR" operation between the Ascii values of each of the letters you picked (the letters have to be in order) - the number you get from that operation (the binary number) is the code you can use to get a 1 year Silver Subscription license for $0
Once you find the code then do the following:

  • Go to the Silver Subscription page
  • Select SN1Y-1L1U (Single-User, 1-Year License)
  • On the shopping cart page plug in the discount code that you identified above and click on "Apply Discount" - that will subtract the full $299 from the price 
  • Proceed with the checkout to obtain your license. 

Rules:

  • One license per customer.
  • Licenses cannot be resold or transferred.
  • Do not publish the code - any licenses obtained by individuals that did not visit each of the 8 product pages above will be invalidated. 
  • The deal expires on 11:59 PM EST on October 4, 2016

Post any comments and/or suggestions here please - we will respond as promptly as we can.

Thursday, November 3, 2016

SQL Data Compare Command Line Wizard - Automate Data synchronization in minutes


xSQL Data Compare V9 comes with a Data Compare Command Line Wizard that makes automating the data synchronization process a breeze:

  1. Run the xSQL Data Compare Command Line Wizard which you will find under All Programs / xSQL Software;
  2. Follow the intuitive configuration steps to completion (you will end up with an xml config file); You can choose whether the database synchronization script will be executed or not. 
  3. Create a simple batch file that calls "xSQLDataCmd.exe YourXMLConfi,xml" and does whatever else you might need it to do like archiving old sync scripts etc. 
  4. Schedule a job that executes the batch file daily or however often you might want to. 

What do you need this for? There are multiple scenarios where this would come in handy:
- synchronizing your web database with your internal databases, like updating inventories, updating orders, updating order status, updating customer lists etc.
- synchronizing your branch office databases with your central repository;
- restoring a particular table or column(s) in case of a mishap.
- etc.

Best of all: the xSQL Data Compare is completely free for SQL Server Express, no strings attached. That may change in the future but for now enjoy using it!

Wednesday, November 2, 2016

Why is SQL Server scanning the clustered index when I have an index on the column I am filtering on?

*Originally published in our old blog on January 2009

I ran into a very simple SQL Server performance related question the other day. A puzzled DBA was staring at a simple query “SELECT * FROM table1 WHERE col_n = x”. Since this was a fairly common query that was executed very frequently he had appropriately created an index on col_n. Yet, for some reason SQL Server was simply ignoring the index on col_n and instead scanning the clustered index. So the puzzling question on this DBAs mind was “why is SQL Server scanning the table? Isn’t the SQL Server Query Optimizer smart enough to see that it will be more efficient to use the col_n index?

The answer lies in the fact that the SQL Server Query Optimizer is smarter than that (albeit not as smart as I wish it would be). You see, when deciding on a particular execution plan the Query Optimizer has to use an actual value for the parameter x to estimate the number of rows that will be returned on each step. It further assumes that the rows you are looking for are randomly distributed and that it will need to do a page read for every row being returned in addition of the reads it needs to do on the index pages. Depending on this number it makes a determination whether it will be more efficient to just scan the whole table and pull out the rows it needs or go to the col_n index first to get a list of addresses and then go and pull those rows.

So, now that we know why should we just leave it there since it appears that SQL Server is correctly picking the most efficient path? Not so fast! Remember all that evaluation is being done based on a certain value of parameter x. It could be that for most of the values of parameter x scanning the table is more efficient. In that case you can simply drop the index on col_n if it is not needed for any other queries and leave it at that. However, it could be that for 99% of the possible values of x it would be a lot more efficient to utilize the col_n index – it just so happened that unfortunately when generating the plan the value of x happened to fall on that 1% for which scanning is more efficient. In this case you have two options:
  • simply force SQL Server to dispose the bad plan that it has cashed and generate a new one; OR
  • use a HINT to force SQL Server to use the index. The danger with this however is that with time as the data changes the use of that index may not be optimal so I would recommend that you avoid using HINTS whenever possible and let SQL Server do its job.


One last note: it is often not necessary to return all the columns – in other words instead of SELECT * FROM table1 WHERE col_n = x you may only need to return a couple of columns like SELECT col_1, col_2 FROM table1 WHERE col_n = x in which case it could be worth it to include col_1 and col_2 in the col_n index. That way SQL Server would not need to go to the table at all but instead get all it needs from the index pages. In certain scenarios where you have a rarely updated but very frequently queried table the above approach of including other columns in the col_n index may make sense even if the query returns all the columns.

Tuesday, November 1, 2016

SQL Split String Function (STRING_SPLIT in 2016)

* originally published in our old blog in August 2011 - updated with SQL Server 2016 reference

As a SQL Server developer you are often faced with the need to split a string of values that may be separated by comma, space, tab, or any other separator. In 2011 we published a simple table-valued function (SplitString see below) that takes a string and a divider as parameters and returns a table containing the values into a list form (one value for each row). The parameters are defined as a varchar(1024) for the string of values and char(1) for the divider but you can change those based on your needs.

As of SQL Server 2016 a new function STRING_SPLIT ( string , separator )  was introduced that does the same thing. So if you are using SQL Server 2016 use the available STRING_SPLIT function (you can read more about it here: https://msdn.microsoft.com/en-us/library/mt684588.aspx).
However, if you are using an older version of SQL Server you can take advantage of our SplitString function:
CREATE FUNCTION SplitString 
(
    @SeparatedValues VARCHAR(1024),
    @Divider CHAR(1)
)
RETURNS    @ListOfValues TABLE ([value] VARCHAR(50))
AS  BEGIN 
      DECLARE @DividerPos1 int, @DividerPos2 int
      SET @DividerPos1 = 1
      SET @DividerPos2 = CHARINDEX(@Divider, @SeparatedValues, 0)

     WHILE @DividerPos2 > 0
           BEGIN 
                  INSERT INTO @ListOfValues VALUES (SUBSTRING(@SeparatedValues, @DividerPos1, @DividerPos2 - @DividerPos1))
                  SET @DividerPos1 = @DividerPos2 + 1
                  SET @DividerPos2 = CHARINDEX(@Divider, @SeparatedValues, @DividerPos1)
            END
           -- Now get the last value if there is onw
                  IF @DividerPos1 <= LEN(@SeparatedValues) 
                       INSERT INTO @ListOfValues VALUES (SUBSTRING(@SeparatedValues, @DividerPos1, LEN(@SeparatedValues) - @DividerPos1 + 1))

        RETURN
  END
GO
Once you create the function you can call it like this:
SELECT * FROM [SplitString] (@mystring, @myseparator)


or with hardcoded values (in this example the separator is a vertical line):
SELECT * FROM [SplitString] ('value1|value2|value3', '|')


This will return:
   value1
   value2
   value3
 
Note that if the string starts with a divider like '|value1|value2|value3' then the first value returned will be a blank value.

You can of course insert those values directly into a table either via INSERT INTO <mytable> ... SELECT * FROM [SplitString]... or into a temp table via SELECT * INTO #mytemptable...FROM...

Monday, October 31, 2016

t-sql random string generator

Note: originally published in our old blog on December 2008.

This is a simple stored procedure that you can use to generate a random string. You can use it as a random password generator and for other purposes. It is very simple so I won't bore you with unnecessary explanations but if you do happen to have any questions feel free to post them here.

CREATE PROCEDURE [dbo].[usp_GenerateRandomString]
  @sLength tinyint = 10,
  @randomString varchar(50) OUTPUT
AS
BEGIN
  SET NOCOUNT ON
  DECLARE @counter tinyint
  DECLARE @nextChar char(1)
  SET @counter = 1
  SET @randomString = ''

  WHILE @counter <= @sLength
    BEGIN
      SELECT @nextChar = CHAR(ROUND(RAND() * 93 + 33, 0))
      IF ASCII(@nextChar) not in (34, 39, 40, 41, 44, 46, 96, 58, 59)
        BEGIN
          SELECT @randomString = @randomString + @nextChar
          SET @counter = @counter + 1
        END
    END
END

Thursday, October 27, 2016

Distributed Databases - One Way Synchronization

Applies to: xSQL Data Compare v7.0.0 – v9.0.0

Business Need

A very common organization of the data infrastructure for big companies who operate in many countries and use some type of centralized system to manage their operations, is to have separate databases for each branch and one database that is operated by the headquarters that has the following data in it:
  • A copy of all of the transactional data (sales, orders, etc.) from each branch.
  • Lookup data like lists of products, services, categories, etc.
Both types of data need to be periodically synchronized between the central database and the branches’ databases. There are two directions for this synchronization.

Central -> Branches
This synchronizes the lookup data. For example, every time the company decides to add new products, services or even a new country where it operates, the logical way to go about this is to add the new data to the lookup tables in the central database and then synchronize the branches’ databases with this central database.

Branches -> Central
This synchronizes transactional data. This type of synchronization can be done at the end of every business day to transfer all the new or updated transactions from the branches to the central database which can then be used by the company’s HQ to build different types of reports.   

Solution

xSQL Data Compare’s one-way synchronization. If the synchronization script is generated using the default options, it will make the database upon which it is executed, the same as the database with which it is compared. But in this case, that is not the desired result. Thankfully xSQL Data Compare offers the option to choose between synchronizing the left, right or different rows, or a combination of these options. This means that if you choose to synchronize only the right rows, rows that are in the right database but not in the left would be copied to the left, and rows that are in the left DB but not in the right would not be deleted.

To demonstrate this, below are the comparison results for the Products table of two Northwind databases (NORTHWND and NorthwindCopy). The Products table in the NORTHWND database does not have products with ID 8 to 14. The Products table in the NorthwindCopy database does not have products with ID 1 to 7. Also, the data for the product with id 20 is different in the NorthwindCopy database. A row is considered different if that row exists on both tables with the same primary key and at least one of the other fields is different. The goal here is to copy products with ID 8 to 14 and the changes in the product with ID 20 from the NorthwindCopy to NORTHWND. This means that xSQL Data Compare needs to generate a script for the left database (NORTHWND) where only the different and new rows from the right database will be synced. These rows will be left checked.

So, all the right rows will be checked:


And all the different rows:
To make sure that none of the rows that are in the left database’s table but not in the right is deleted, all the left rows will be unchecked:
Doing this will generate the following script (when Generate script for NORTHWND is clicked):

/*-- -Delete(s): [dbo].[Products] */

/*-- -Update(s): [dbo].[Products] */
SET IDENTITY_INSERT [dbo].[Products] ON;
UPDATE [dbo].[Products] SET [QuantityPerUnit]=N'35 gift boxes' WHERE [ProductID]=20
SET IDENTITY_INSERT [dbo].[Products] OFF;

/*-- -Insert(s): [dbo].[Products] */
SET IDENTITY_INSERT [dbo].[Products] ON;
INSERT INTO [dbo].[Products] ([ProductID],[ProductName],[SupplierID],[CategoryID],[QuantityPerUnit],[UnitPrice],[UnitsInStock],[UnitsOnOrder],[ReorderLevel],[Discontinued]) VALUES(8,N'Northwoods Cranberry Sauce',3,2,N'12 - 12 oz jars',40.00,6,0,0,0);
INSERT INTO [dbo].[Products] ([ProductID],[ProductName],[SupplierID],[CategoryID],[QuantityPerUnit],[UnitPrice],[UnitsInStock],[UnitsOnOrder],[ReorderLevel],[Discontinued]) VALUES(9,N'Mishi Kobe Niku',4,6,N'18 - 500 g pkgs.',97.00,29,0,0,1);
INSERT INTO [dbo].[Products] ([ProductID],[ProductName],[SupplierID],[CategoryID],[QuantityPerUnit],[UnitPrice],[UnitsInStock],[UnitsOnOrder],[ReorderLevel],[Discontinued]) VALUES(10,N'Ikura',4,8,N'12 - 200 ml jars',31.00,31,0,0,0);
INSERT INTO [dbo].[Products] ([ProductID],[ProductName],[SupplierID],[CategoryID],[QuantityPerUnit],[UnitPrice],[UnitsInStock],[UnitsOnOrder],[ReorderLevel],[Discontinued]) VALUES(11,N'Queso Cabrales',5,4,N'1 kg pkg.',21.00,22,30,30,0);
INSERT INTO [dbo].[Products] ([ProductID],[ProductName],[SupplierID],[CategoryID],[QuantityPerUnit],[UnitPrice],[UnitsInStock],[UnitsOnOrder],[ReorderLevel],[Discontinued]) VALUES(12,N'Queso Manchego La Pastora',5,4,N'10 - 500 g pkgs.',38.00,86,0,0,0);
INSERT INTO [dbo].[Products] ([ProductID],[ProductName],[SupplierID],[CategoryID],[QuantityPerUnit],[UnitPrice],[UnitsInStock],[UnitsOnOrder],[ReorderLevel],[Discontinued]) VALUES(13,N'Konbu',6,8,N'2 kg box',6.00,24,0,5,0);
INSERT INTO [dbo].[Products] ([ProductID],[ProductName],[SupplierID],[CategoryID],[QuantityPerUnit],[UnitPrice],[UnitsInStock],[UnitsOnOrder],[ReorderLevel],[Discontinued]) VALUES(14,N'Tofu',6,7,N'40 - 100 g pkgs.',23.25,35,0,0,0);
SET IDENTITY_INSERT [dbo].[Products] OFF;


As you can see, INSERT statements are generated for products with id 8-14. An UPDATE statement is also generated for Product with ID 20 and there are no DELETE statements.
Execute the script and there you have it, all the rows that are different and in NorthwindCopy but not in NORTHWIND are copied to the latter. To do the opposite, simply check all the left rows, uncheck the right and generate a script for NorthwindCopy.
One thing to note: In real life scenarios, to use this technique, it would be preferable to have all the Primary keys as ‘uniqueidentifiers’ to avoid primary key collision. 

Automation

As always, xSQL Data Compare Command Line can be used to automate the entire process in order to perform this synchronization periodically. All you need to do is after you have specified the rows you want to sync is to generate the XML file that will be passed as an argument to xSQLDataCmd.exe. This can be done by clicking this button:

First 100 get Silver for $100

Save $199 today! You can get a 1 year Silver Subscription for only $100 if you act fast. Use code SILVER100 on checkout. The code will be disabled either when the 100-th subscription is claimed OR at the end of the day on October 28, 2016 (Eastern Time), whichever comes first.

Also in case you missed our announcements, new versions with full support for SQL Server 2016 and SQL Azure v12 are available for the following tools:
The new versions include support for security policies, encrypted columns, stretched databases, system-versioned tables etc. A link to the complete list of the new and improved features included in the new versions can be found at the end of the description paragraph on each product's page.

Thursday, October 20, 2016

Syncing QA data with Production

Applies to: xSQL Data Compare v7.0.0 and higher

WARNING: this article focuses on the data transfer / synchronization task and does not address operation security issues and sensitive data scrubbing / obfuscation which are critical whenever dealing with live, production data.

Nowadays, Quality Assurance (QA) is a very important part of the development process for any company that strives to offer a reliable product, to satisfy its clients, and be competitive in the market. And let’s not forget the “side benefit” of reduction of life cycle costs.

One of the main aspects of QA are the data and databases it uses. These data are usually kept in a separate environment from the production and, to have the best possible quality assurance process, data from the production environment are copied to the QA environment. For this task there is a choice between two main options:
  • Backing up and restoring the live database. Although this might work with small databases, if we are dealing with large databases with many tables and millions of rows, it becomes a very expensive operation because the database will have to be recreated each time the synchronization is performed. Also, if the databases are in a cloud environment like Azure, which does not support restoring a backup, this option is automatically eliminated. As a final point, in those cases where backup – restore is a viable option, there is always the issue of automating the synchronization process, which in the case of backup - restore operations is problematic at best. 
  • Using comparison tools like our xSQL Data Compare. For any large databases, whose data change rapidly, this is probably the best option. And that’s because the comparison and synchronization process is highly customizable and easy to automate.
     There are two cases that show in detail how xSQL Data Compare’s features can be used in the QA synchronization process.

  1. Suppose you have a production database with a table which currently has 5 million rows and needs to be synchronized with the QA Database. One way to go about this is to back up the live database and restore it in QA. The problem here is very easy to identify. Unless this is the first synchronization, it’s very improbable that all 5 million rows of the table in the Production database will have differences from the table in QA.
    For argument’s sake, let’s say that there are 100,000 records out of sync. If one was to use the backup – restore option, 5 million new rows would be inserted in the table in the QA database. So there’s 4,900,000 unnecessary INSERT operations and the server will be doing 50 times the amount of work it actually needs to do. By any standards, this is unacceptable.
    The process can be made much more efficient by using xSQL Data Compare, because after the comparison, xSQL Data Compare generates a synchronization script
    only for the rows that are out of sync. This is a big improvement already, but it can be made even better. Since the synchronization process is, in most cases, performed periodically, every week for example, than you already know that the only rows that are out of sync are the ones added or modified in the week prior to the synchronization. So there is no need to compare all 5 million rows. Just the ones that are out of sync.
    You can do this by using the
    where clause of xSQL Data Compare in which you can enter conditions in the same way you would enter them in a SQL Query. Below is an example in which the where condition is specified as ModifiedDate >= DATEADD(DAY, -7,GETDATE()). This will compare only the records which were modified in the last week. To open the dialog shown in the picture click the button selected in red.

  2. As I said in the first case, synchronization of the QA environment is usually a periodic and very repetitive process, so automating it would save a lot of time for DBAs or people responsible for this task. Data Compare addresses this issue with its command line version. The comparison from the first case can also be done from xSQL Data Compare command line and scheduled to be run periodically with Windows Task Scheduler. The same options that were specified in the UI can be specified in an XML file that will be given as a parameter to xSQLDataCmd.exe. Below is the example XML configuration to perform the same comparison as in the first case.
<?xml version="1.0" encoding="utf-8"?>
<SqlDataCompareCmdConfig xmlns="http://www.xsqlsoftware.com/schemas/xSQLDataCompareCmdSchema.xsd">
  <!-- **** auto-generated data compare cmd line config file, created on 10/20/2016 4:14:43 PM **** -->
  <LeftDatabase>
    <SqlServer>Production</SqlServer>
    <DatabaseName>AdventureWorks2012</DatabaseName>
    <TrustedConnection>true</TrustedConnection>
  </LeftDatabase>
  <RightDatabase>
    <SqlServer>QualityAssurance</SqlServer>
    <DatabaseName>AdventureWorksCopy</DatabaseName>
    <TrustedConnection>true</TrustedConnection>
  </RightDatabase>
  <TablesMappingRules />
  <TablePairs>
    <!-- ******* custom pairs ******* -->
    <!-- Sales.SalesOrderHeader -->
    <Pair Action="Include">
      <LeftObject Name="Sales.SalesOrderHeader" />
      <RightObject Name="Sales.SalesOrderHeader" />
      <WhereClause>ModifiedDate >= DATEADD(DAY, -7,GETDATE())</WhereClause>
    </Pair>
    <!-- **************************** -->
  </TablePairs>
  <CommandLineOptions>
    <ErrorLogName>xSQL</ErrorLogName>
    <ErrorLogType>WindowsLog</ErrorLogType>
    <OverwriteComparisonLog>true</OverwriteComparisonLog>
    <Direction>RightAsLeft</Direction>
    <Synchronize>true</Synchronize>
  </CommandLineOptions>
</SqlDataCompareCmdConfig>


Now, all that needs to be done is for the task to be scheduled in windows task manager and Data Compare will synchronize all the changes made in the last week in the production database. And just so you don’t have to manually write the XML file, xSQL Data Compare can generate it for you from the UI by clicking this button.
If, for any reason, the schema in your production database has changed and is out of sync with the QA database, use Schema Compare for SQL Server to sync the schemas first and then sync the data.

In conclusion, apart from the scenario described in this article there are a ton of other synchronization scenarios which, by using xSQL Data Compare, can be customized to be very efficient, and have the QA environment at your disposal in a very short time. For a full reference of the available customizations check out xSQL Data Compare’s onlinedocumentation.

Tuesday, October 18, 2016

Columnstore Indexes in 2 minutes

The standard way of storing relational database tables on physical media is row based, that is, each row occupies a contiguous space. The term that is used for this type of data storage is rowstore.

In simple terms, you can think of the columnstore as a transposed rowstore. Logically nothing changes, you can still think of and see a table as a normal table with rows and columns, but physically the data is stored in a column-wise format.

Why do this and when? 

  • Think of a column like “Country” on say an “Orders” table – you basically have a handful of country IDs repeating millions of times. Just imagine the kind of data compression you can achieve on such column! 
  • Now think of a query like “get sales by country” – instead of scanning the whole table, SQL Server will only need to deal with two compressed columns and will be able to return the results many times faster using significantly less resources. 
  • When? Storing fact tables and large dimension tables in data warehouses as clustered columnstore indexes will significantly improve compression and query performance.
Why not do this?
If columnstore indexes are so great why not store tables as clustered columnstore indexes always? Just imagine what an insert|update|delete looks like in the case of a clustered columnstore index for a table that say has just 20 columns! It is kind of like doing 20 separate inserts|updates|deletes, one for each column. So, on a transactional database columnstore indexes are not a good idea.

Best of both worlds?
SQL Server 2016 lets us create an updatable non-clustered columnstore index on a rowstore table and non-clustered rowstore indexes on clustered columnstore indexes. This mixing comes with a cost in both cases but in certain scenarios the gains achieved make this worthwhile.

Our Schema and Data Compare tools support comparing and synchronizing columnstore indexes.

Monday, October 17, 2016

xSQL Schema Compare SDK v9 released

A new version of our SQL Server Schema Compare SDK is now available for download. The new version brings full support for SQL Server 2016 and the latest features of SQL Azure v12, including support for system-versioned tables, memory optimized tables,  stretch tables, security policies etc. All the details of the new release can be found here: https://www.xsql.com/products/sql-server-comparison-bundle/release-notes/version-9

The xSQL Schema Compare SDK allows developers to easily integrate SQL Server database schema comparison and synchronization functionality in their own .NET applications.

You can download the new version of the SQL Server Schema Compare SDK from: https://www.xsql.com/download/sql-server-schema-compare-sdk

Friday, October 14, 2016

Synchronizing databases with stored procedures referencing FREETEXTTABLES

Applies to: xSQL Schema Compare v7.0.0 - v9.0.0

Some time ago, I had to copy an entire database to a new one that was already created on Azure. So, of course, I decided to use xSQL Schema Compare and Data Compare, given that the “backup/restore” option was not available. There were two elements in the database that made this case unique in regards to the schema synchronization process:
  • One of the tables (let’s call it ‘T’) had a full-text index.
  • There was a stored procedure (we will call this ‘SP’) that used table ‘T’ as a FREETEXTTABLE.

Full-text indexes are non-transactional by design, so in the synchronization script for the new database, these are added after the main transaction, which synchronizes all the other elements including the stored procedures.

The issue: The synchronization script tries to create a stored procedure which uses the table ‘T’ as a FREETEXTTABLE, before the full-text index is created. SQL Server will not allow this because to use a table as a FREETEXTTABLE, there needs to be a full-text index in this table.

The workaround: Thankfully, the comparison process is customizable and the solution to this problem is just a matter of checking/unchecking a few database objects from the comparison options. For this particular case, the comparison and synchronization needs to be done in 2 steps, each with different comparison options.
  1. Exclude stored procedures by unchecking the “Stored Procedure” checkbox (picture bellow) and compare and synchronize the databases. Schema Compare will not generate a script to synchronize stored procedures, which means that SQL Server will have no problem with adding full-text indexes at the end of the synchronization.
  2. Do the comparison again, but this time, uncheck everything except for the Stored Procedures (leaving them checked is not an issue, but it will take longer and since the other objects were synchronized, there is no need to compare them again) in the Database Objects tab. This time, a synchronization script will be generated only for the stored procedures, which were not synchronized on the first step.
Conclusion: As a general practice, to solve problems where the order in which database objects are synchronized becomes an issue, all you need to do is remove the objects that are causing problems from the comparison, compare and synchronize, and then do another comparison and synchronization only for the objects that were excluded in the first step.